Published: Jan 17, 2023 by K. E. Claytor
When staying at a bed-and-breakfast they had these really neat hexagonal ice cube trays. We picked up some of our own when we got home, but the thought was planted - “what other shapes could I do?” Of course, one of the most interesting space-filling tiling artists of all time has to be M.C. Escher.
The Method
This was unfortunately very painstaking. The first step was to start with the art on the left - the sketch of the bird/fish space filling pattern.
Then, in gimp I adjusted levels, brightness / contrast, and saturation, and applied a threshold to reduce the image to just the black trace lines between the bird/fish. In the center, you can see these lines cleaned up into only the center four-by-four bird/fish pattern.
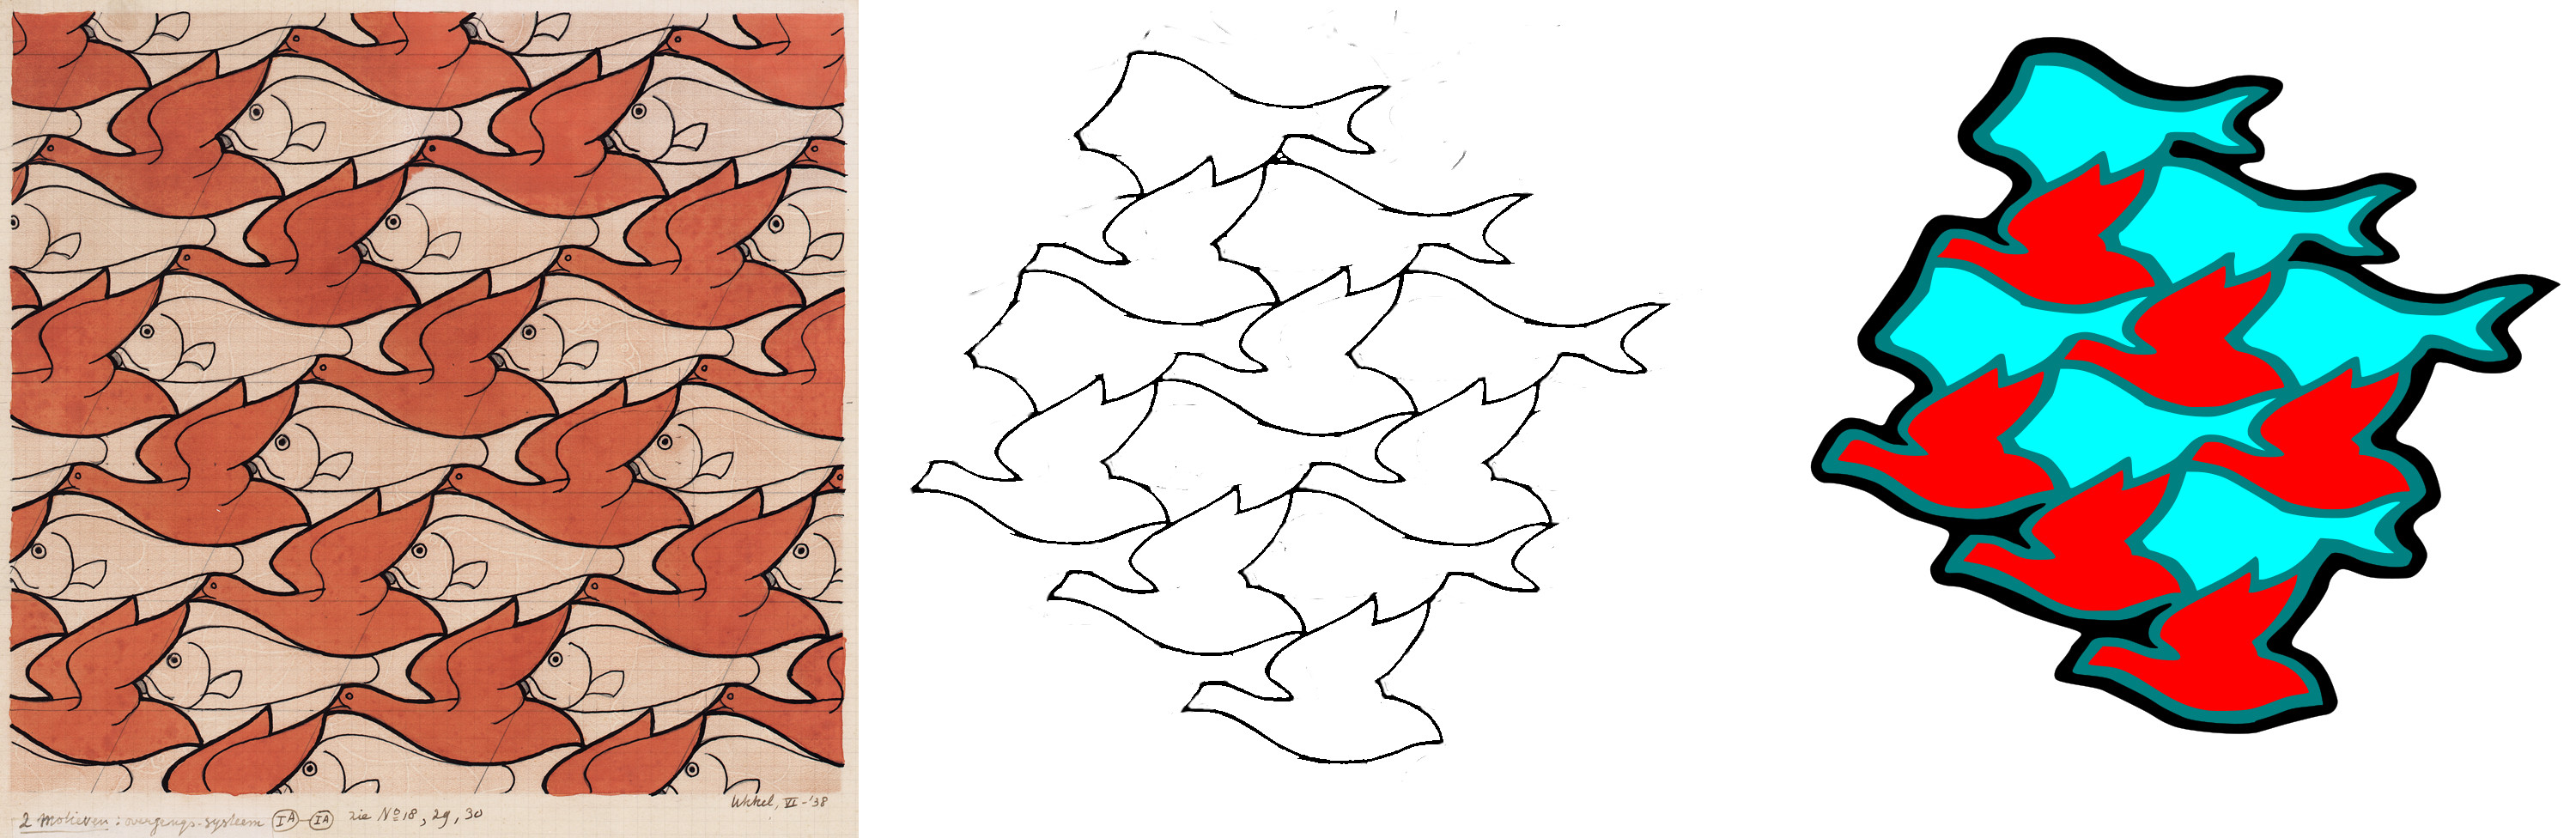
Next, I imported these into inkscape and did a vector trace (right). This applied a lot of vector points, which I had to reduce by hand, once I had nice vector-art of just the bird/fish black lines, I made three copies. Remember, the trace of a thick line produces two vector lines, one for the interior line and one for the exterior line, and they are filled in-between.
This gave me;
- just the interior lines
- just the outer lines, enlarged
- just the outer trace of the outer lines, enlarged
The interior lines (1) were separated and filled with the light turquoise / red in the image. The outer lines, enlarged (2) were filled with black and form the outer wall. The trace of the outer lines (3) form the base of the mold.
Each of these was imported into TinkerCAD and raised to a different height. The base (3) is the shortest and supports the center pattern (1) and the wall (2), which is the tallest layer to hold the silicone in.
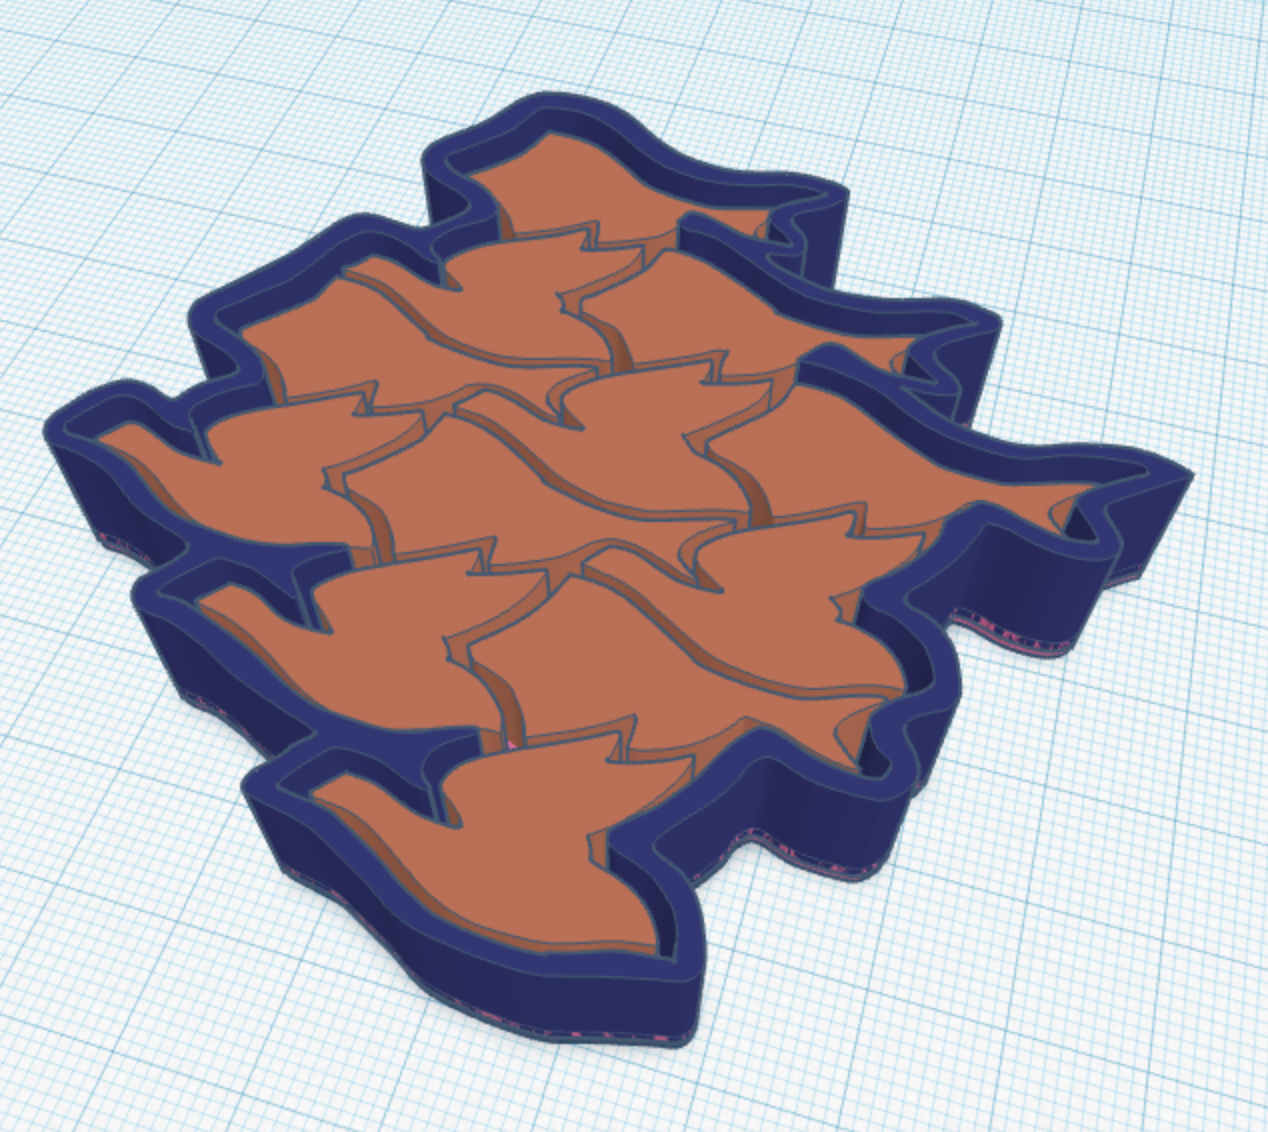
Once the 3D model was done, it was off to the printer.
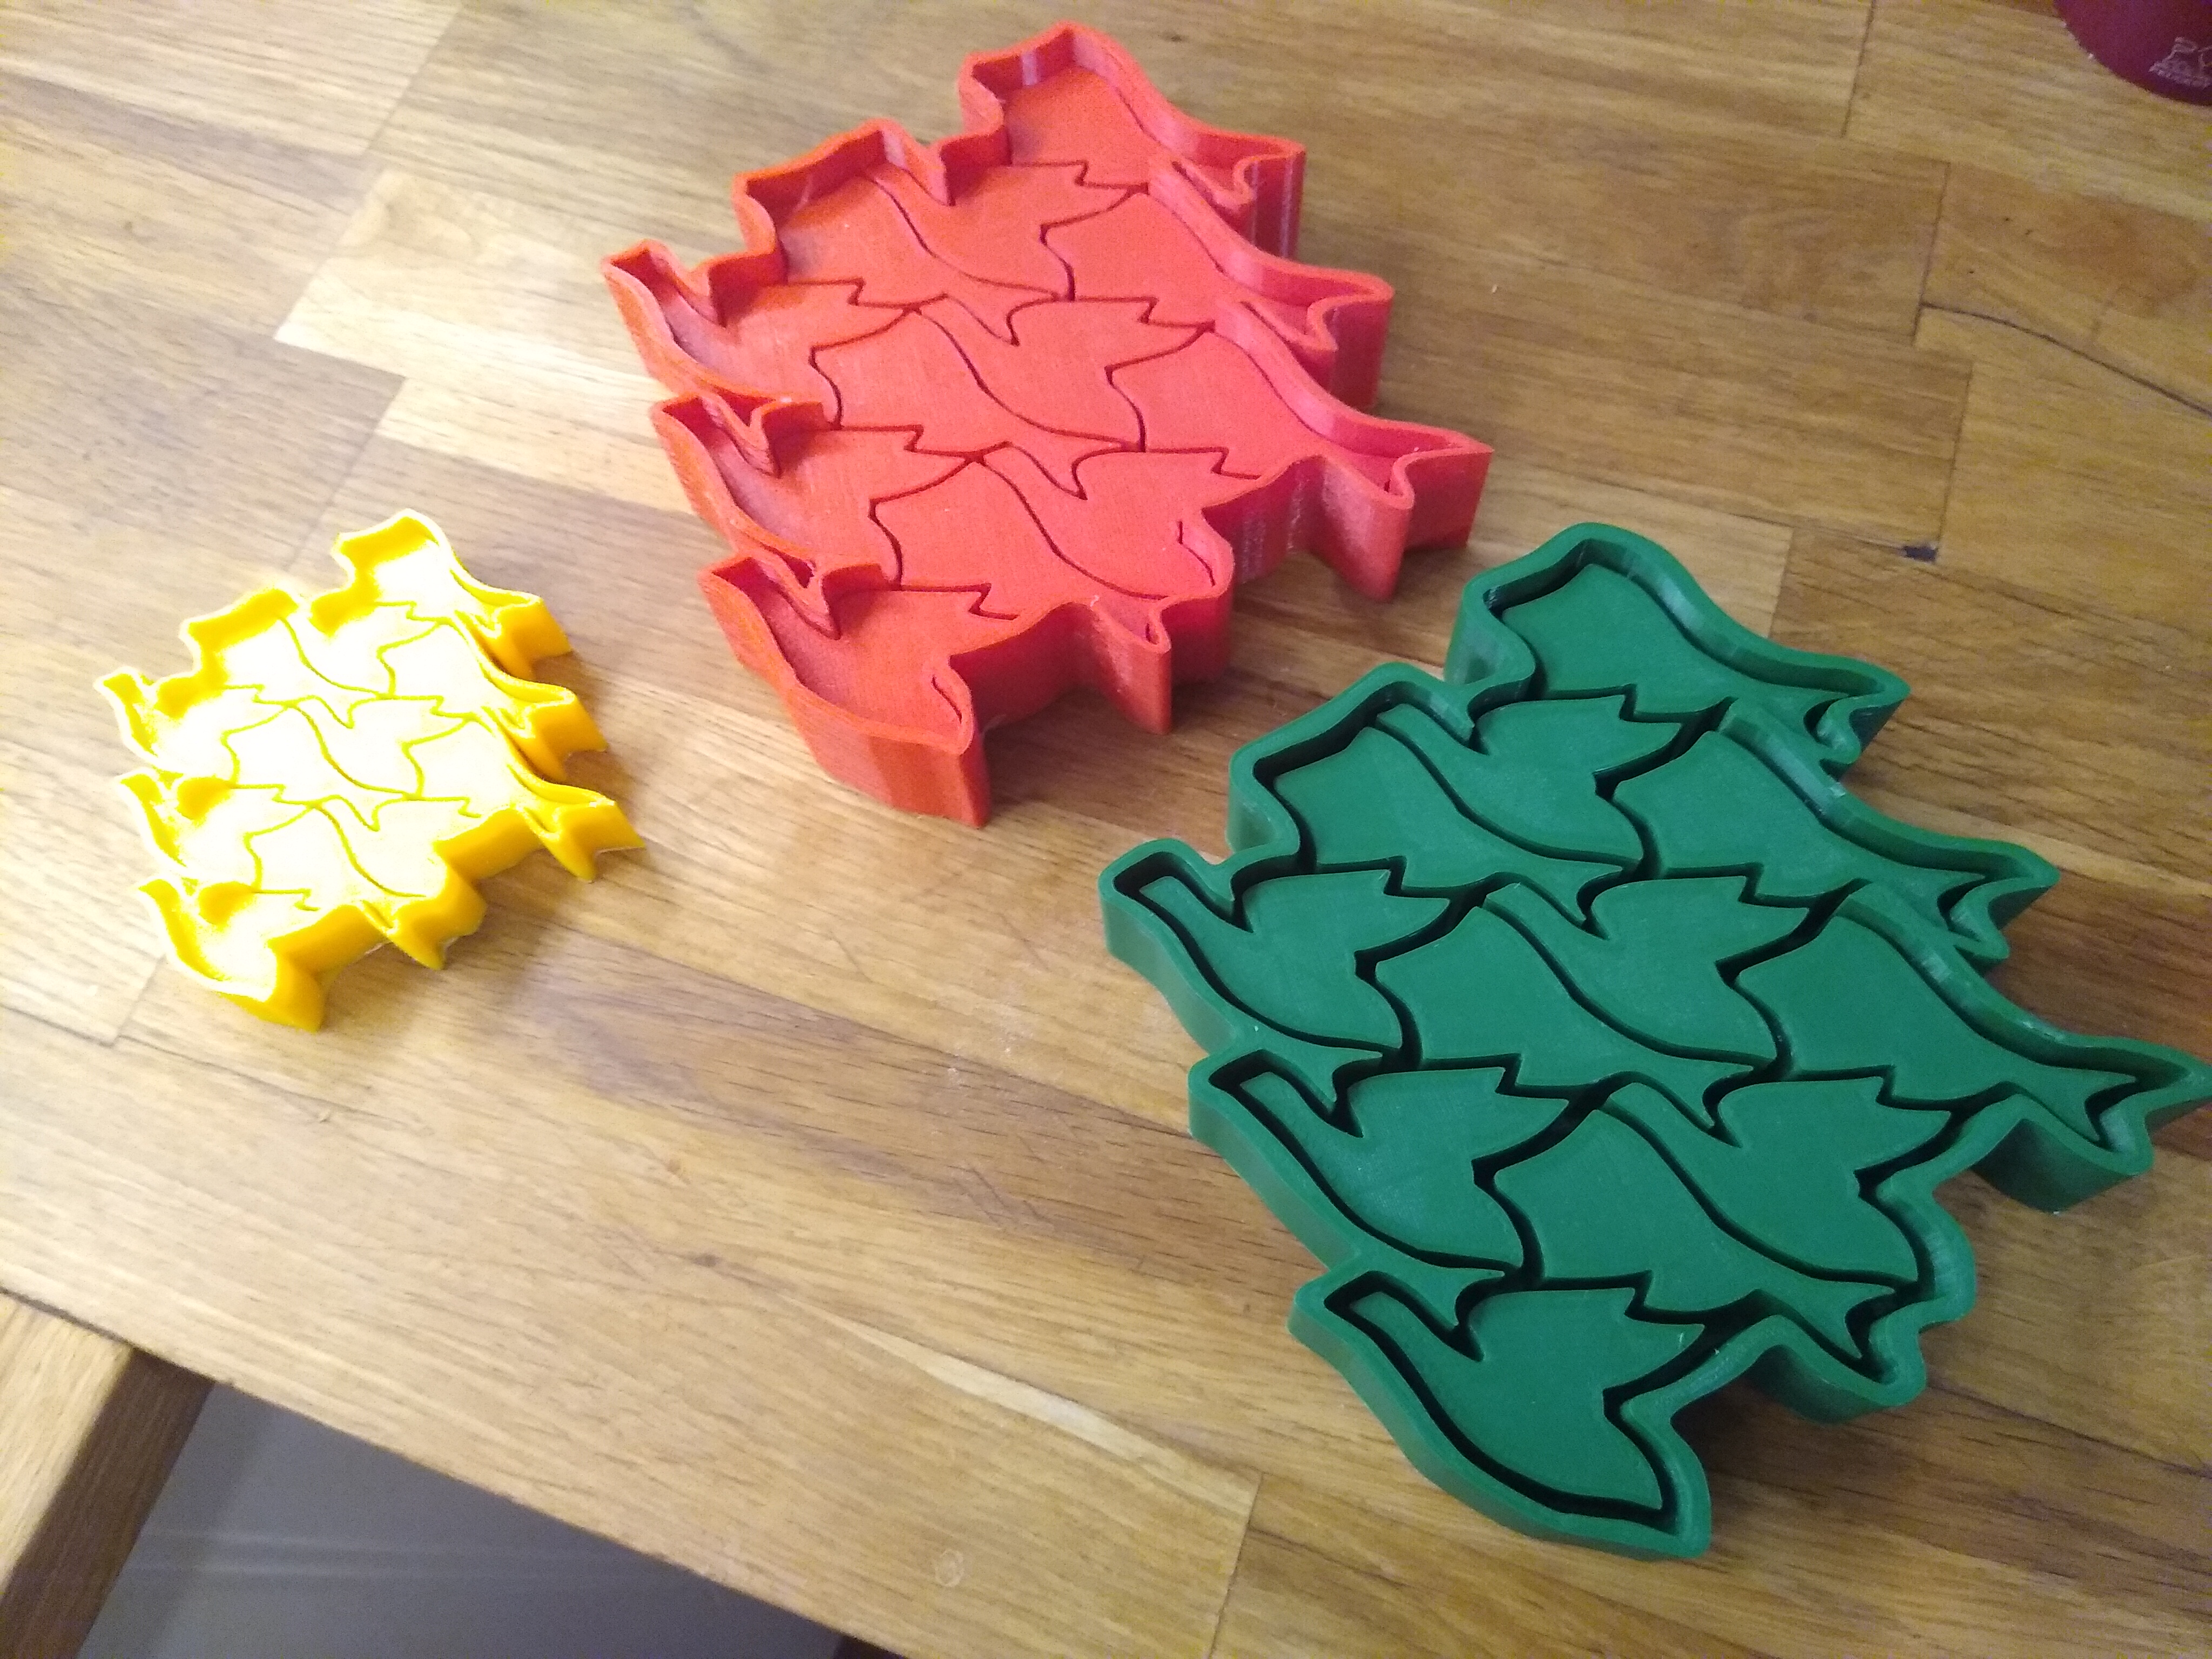
The Molds
Naturally, I didn’t get the mold size correct the first time. The first iteration (yellow) was much to small. The second (red, 170% size) didn’t have enough space for the mold to flow into. I had to head back to inkscape and manually move the verties around to get to the third (green) iteration, which was just right.
The Results
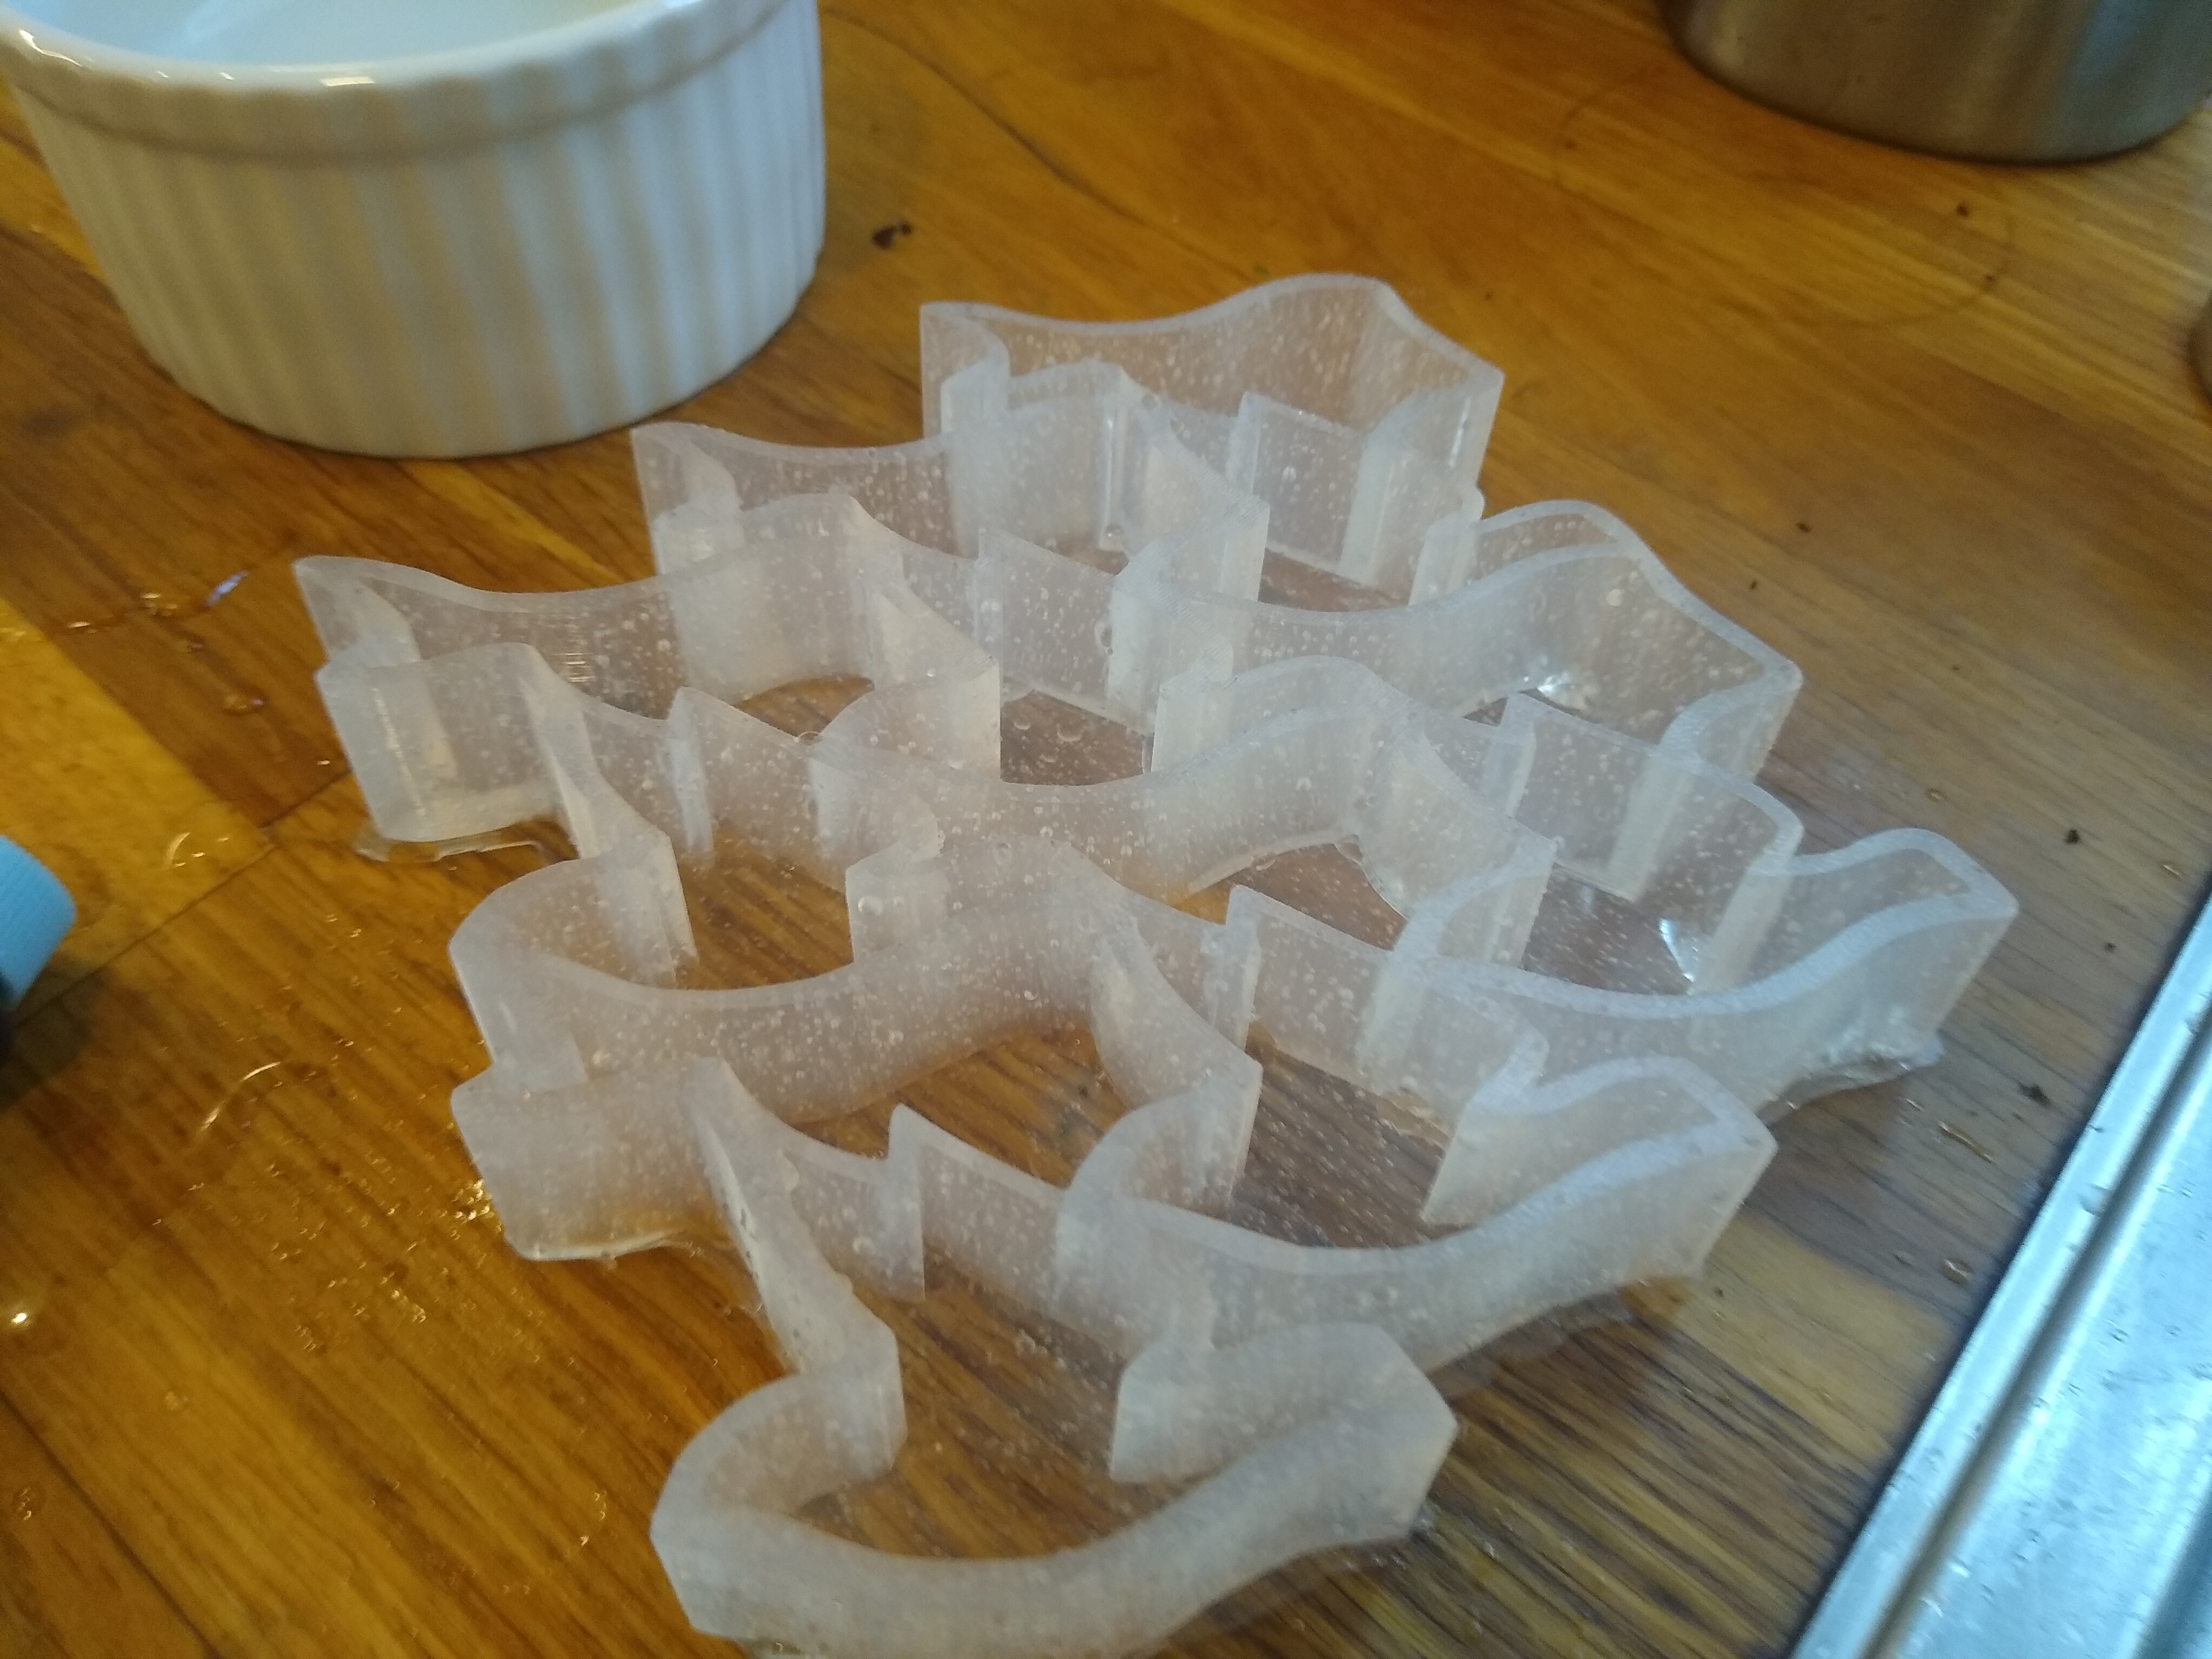
The result is a pretty good mold. I only relied on time and the viscosity of the silicone to allow it to seep into the cracks and allow the larger air bubbles to rise to the surface.
There are some small air bubbles within the mold, but the walls are intact and well-separate the different ice voids. Ideally, I would have a vacuum chamber for this step to further degass the silicone and remove the rest of the bubbles.
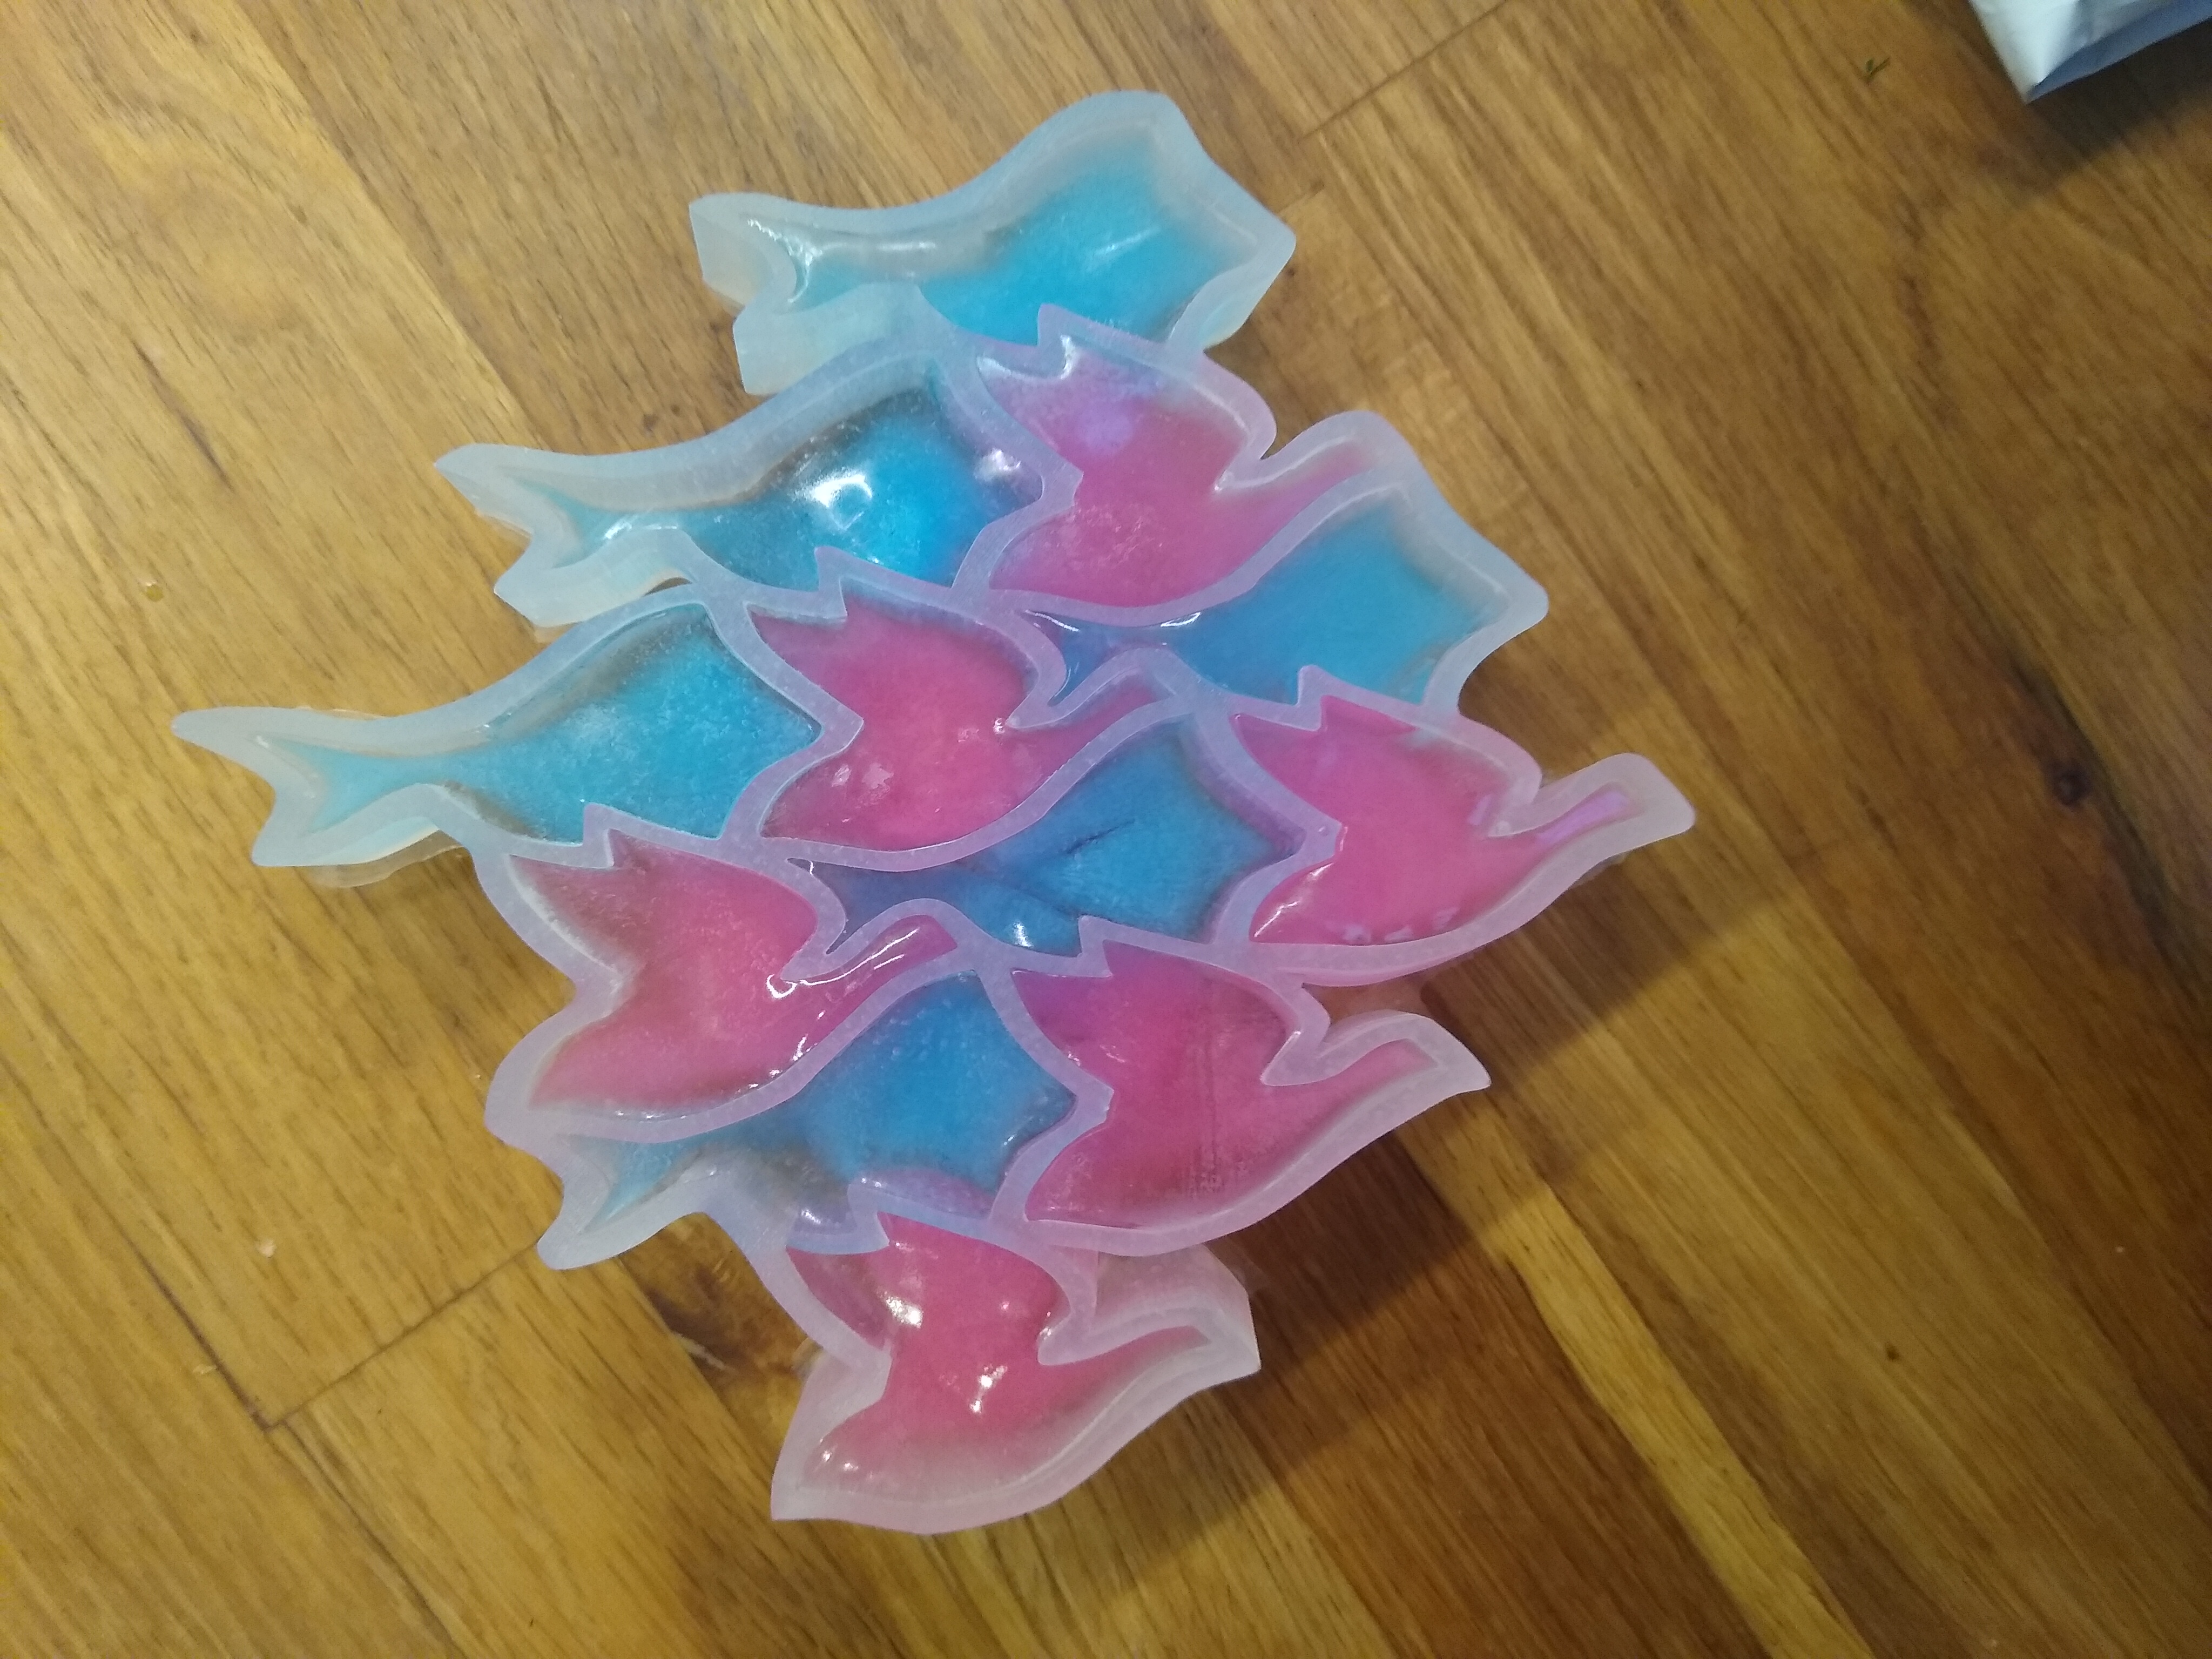
Putting some colored water into the mold makes for a really striking picture:
Next Steps
While writing this up kiddo pointed out that the mold has the birds facing the other direction - the opposite direction of the art! Quite obvious in hind-sight as the mold is a negative of the 3D print. Clearly I’ll have to do a left-right mirror and correct the ice cube tray to more closely match the art.